It's pretty random if I enter into a giveaway but you know what they say when in rome.
If you remember a post I did awhile back on what to get your crocheter or knitter for Christmas I mentioned an amazing book by Twinkie Chan. Well Twinkie has graced us with a wonderful giveaway.
I highly suggest you enter!
Enter now!
Tuesday, June 26, 2012
Thursday, June 7, 2012
My entry for the 2012 Sugar slam
Yesterday night I got a wild hair up my ass to bake something. The coolest person ever runs this wonderful kick ass blog called bake and destroy and each year she has a baking/cooking wrestling theme compition called Sugar slam. I highly recommend that you enter and have fun.
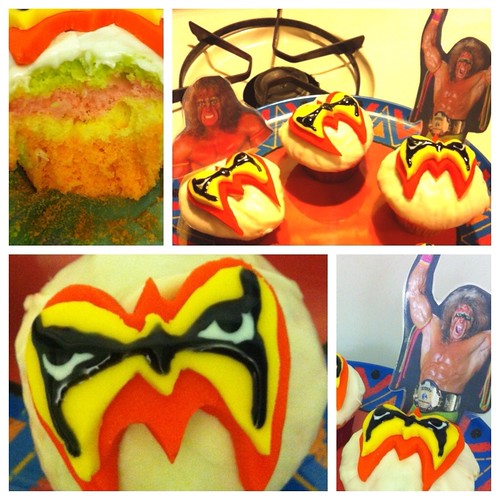
My submission is something I thought of while waiting in line to see the new Avengers movie.
So I had spent the good part of my day dragging my daughter and other half around northeast San Antonio picking up cake mix,icing and food coloring.
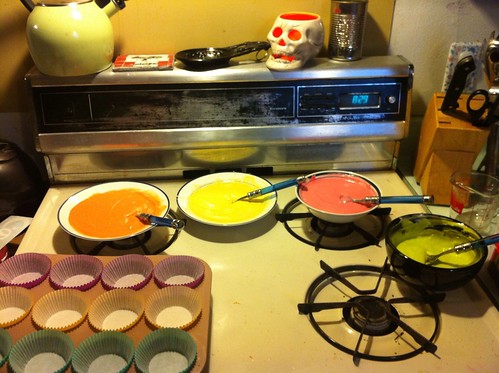
So once dinner was out of the way(my daughter having her popcorn shrimp likes she always ask for and my boyfriend and I making salon burgers....soooo good) I told everybody the kitchen was off limits which wasn't a problem since the spurs game was on. I mixed my cake mix and separted it into four bowls.
Started coloring them in Ultimate warrior colors orange on the bottom,yellow,pink and neon green to top it off. Baked at 400* degrees for 20-22 min.*Did the toothpick test to make sure they were ready.
I learned a few tips on how to ice the top from the youtube Nerdy Nummies.
So finally once my frosting was cooled I started working with pondent and if you don't know what that is..it's alot like edible clay. It's a type of almond paste that can be made or bought. Comes in a million colors and can be cut,molded or designed anyway you want it. I traced with a toothpick the detail of the mask and layed it on the cupcake then I topped it off with black & while icing for the eyes. After this project I don't think I want to see another cupcake as long as I live.
It still was fun to do and I hope the judges like my entry.
As you can see everything had to have the ultimate warrior colors on it.
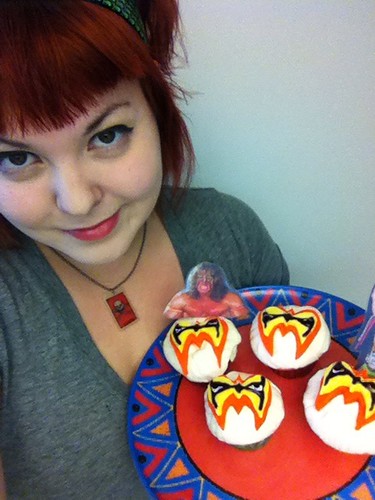
The plate was my mother's I had found and decided to use.
So wish me luck because I might not want to do this for awhile now heehee!
Monday, June 4, 2012
Skull appreciation day 2012: Beginners mosaics-Skull
So you wanna get into mosaics? Well I'm gonna be honest if you are willing to get messy and be willing to wait a day or two for it to dry then you are in luck.

What you will need:

What you will need:

Now craft stores have this wonderful thing of over charging for basic materials you can get at your local hardware store for less. I only advise that you read the labels and do a practice run before committing to working on any project. Which will save you from a headache.The videos below are basic ground rules on how to apply the glass or ceramic and clean up the finished project.


What to get at the craft store:
*wood tile or wood cut out
*glass & ceramic cutter
*glass,ceramic squares(or pieces of glass or ceramic from left over dishes that you can take a hammer to at home).


What you can get at the hardware store:
*wood finish(little 8oz can for $2)
*Acrylpro tile adhesive or liquid nails with a tube gun)
*Pre-mixed grout(comes in a million colors for $8)
* 1 spreading tool
* 1 paint brush for wood stain


 What to get at the store
* 2 sponges
* plastic gloves
* face mask and safety goggles
*plastic bowl for mosaic use only
Step 1:
First things first paint your stain onto the wood. After it drys start using your adhesive by applying it or spreading it on the wood.
Don't forget your gloves and mask.
Step 2:
Now apply your pieces and if you need to cut your square a certain way use your tool on the ends of the pieces like so. Trust me if you use the tool in the middle you won't cut your square it will just hurt your hands.


Now here is the video from expert village on how to apply the pieces and the lady that does it almost sounds like a yoga teacher so I feel like I should be meditating or doing some pretzel move. Now coming back to the project arrange them the way you want it. So in my case I made a skull.


Step 3:
After your adhesive is dry now it's time to apply the grout using your sponge.

Once your grout is applied and has dryed it is time to clean up with the other sponge and water.
Go over lightly and all the loose debree will come off.

I know it's late but here is the blog roll.
Here are the other blogs apart of the smeared ink blog hop for Skull Appreciation Day. I will post later my basic mosaic tile and how to get started.
Terra
Tori
<
Black Dragon
Monique
Helen
Lady Brayton
Fiona
Christine
Jane
Judy
Alison
Susan
Andrea
Smudger Challenge
Laura
Lisa
Kristy
Steph
Glittery Katie
Lisa
Kapree
Ms. Ruin
Kathi
Bombshell Stamps Blog
Dianne
Donna
Nydia
Lady Coral
Suzi
Julia
Patti
Miko
Renee
Wendy
Christina
Hazel
Skye
Wenchkin
Betsy
Scrapbook Stamp Society
Subscribe to:
Posts (Atom)